Crazy Good Cocoa Nib Cookies, Part II

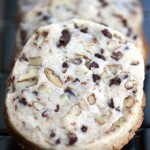
This cookie is nothing fancy to look at. But you just might want to brace yourself as its powerhouse of chocolate flavor is sure to floor you.
It’s hard to believe there are only three — yup, count ’em — tablespoons of cocoa powder in the entire batch of cookies.
You’d swear with a chocolate taste this intense that I dumped the entire can of cocoa powder in there, and then some.
But nope, it’s just that little bit along with 1/4 cup of pulverized cocoa nibs that makes these treats taste like a deep, rich cup of hot cocoa in cookie form.
This recipe for “Chocolate-Cocoa Nib Shortbread Cookies” is from “The Art and Soul of Baking” (Andrews McMeel) by Cindy Mushet, a professional pastry chef and baking instructor in Pasadena.
These slice-and-bake shortbread are crisp, crumbly and buttery. And they get extra crunch from the nibs, small broken nuggets of roasted, shelled and cracked cocoa beans.
Yeah, they’re not much to look at. But trust me, your taste buds won’t know what hit them.
Chocolate-Cocoa Nib Shortbread Cookies
(Makes about 36 cookies)
1/4 cup granulated sugar
1 stick cold unsalted butter, cut into 1/2-inch pieces
3/4 cup plus 2 tablespoons (4 1/4 ounces) unbleached, all-purpose flour
3 tablespoons (3/4 ounce) unsweetened cocoa powder, either Dutch-process or natural
1/8 teaspoon salt
1/4 cup (1 ounce) roasted cocoa nibs
3 tablespoons sanding or decorator’s sugar
Place granulated sugar, butter, flour, cocoa and salt in a food processor fitted with the metal blade. Process for about 45 seconds. Scrape down bowl and break up any large clumps with rubber or silicone spatula. Process for another 15 to 30 seconds, until dough looks uniformly dark and forms large, shaggy clumps. Add cocoa nibs and pulse 4 or 5 times to mix into the dough. Dump dough out onto a work surface and knead gently several times, just to bring it together.
Squeeze dough into a log about 12 inches long and about 1 inch in diameter, and gently roll it back and forth until smooth. Don’t add flour if the dough is sticky — simply refrigerate dough for 15 to 20 minutes to firm up the butter, then try again.
If you like, sprinkle sanding sugar on work surface alongside the log and gently roll log in the sugar, turning to coat evenly. Cut a piece of plastic wrap several inches longer than the log and center the log at one long edge of the wrap. Roll log into the wrap so it is tightly bound by the plastic. Twist ends of the wrap to secure the log and help to create a rounded shape. You can use a cardboard paper towel roll to keep the roll of dough nicely rounded during storage. Just slit the cardboard lengthwise and slip the log inside it to help keep the rounded shape. Refrigerate for 2 hours.
Preheat oven to 300 degrees and position and oven rack in the center. Line baking sheet with parchment paper.
Remove cardboard and plastic wrap from dough log and use a thin knife to slice it into 3/8-inch-thick rounds. Place about 18 cookies 1 inch apart on the prepared baking sheet. Bake, rotating the sheet halfway through the baking time, for 30 minutes, or until cookies are cooked through and look dry on top. (It’s difficult to tell when dark chocolate cookies are done. This is when an oven thermometer and a timer are your best friends in the kitchen.) Transfer cookies to a cooling rack and let them cool completely.
Storing: Keep cooled cookies in an airtight container at room temperature for up to 1 week.
From “The Art and Soul of Baking” by Cindy Mushet

More: Crazy Good Cocoa Nib Cookies, Part I (Nibby Pecan Cookies)

More: Raisin, Rosemary, and Cinnamon Focaccia by Cindy Mushet

These sound incredible! Very chocolatey and I love the cocoa nibs! We’ve been getting chocolate-covered cocoa nibs and just munching on those alone but I think it’s time to add them into cookies like this, yum!
They look like chocolate powerhouses to me, and I am ready to take them on – as soon as I have a kitchen again, I know what I’m going to try.
I’ll take a dozen, please! 🙂
Another lovely recipe!
Cheers,
Rosa
These sound divine!
Where does one find cocoa nibs? These look great to add to a cookie basket!
Never mind, I just read the Pecan Cookie post!
How yummy! I’ve never heard of cocoa nibs.
These are beautiful. I love the chunks of nibs you can see in the cookies 🙂
Amazing!
Nothing special?! What are you talking about? They look dark and intense…ooh…gorgeous…and now I hear there are nibs in it, these are gold!
It’s so nice to meet you. I came here by way of Hungry Dog’s wonderful blog. These cookies look wonderful! Your photography is so beautiful, it looks like I could just reach in and grab one of those cookies!
Now, I have to decide which cocoa nib cookie to try first! Could you send me samples of both? 😉
It’s only recently that I’ve discovered that coco nibs have uses outside chocolate bars. This looks like a fantastic use those crunchy heaven-sent nibs.
i haven’t thought of baking with cocoa nibs. this sounds great.
Wow, all I saw were the words “crazy good” and “cookies” and I knew this was something that I had to try!
Made these for Christmas presents, thanks for the recipe!
Pingback: Favorite Chocolate Shortbread Cookie
Pingback: Favorite Chocolate Shortbread Cookies