Holiday Cranberry Crumble Pie
What would Thanksgiving be without a perfect pie to end the meal?
Just lacking, plain and simple.
I know people who would gladly bypass the turkey and fixings, just to lunge for the finale of pie, pie and more pie.
Because I’m one of those people who actually doesn’t like pumpkin pie, I’m always on the hunt for an alternative that’s just as homey, festive, and — in my mind — far more delicious.
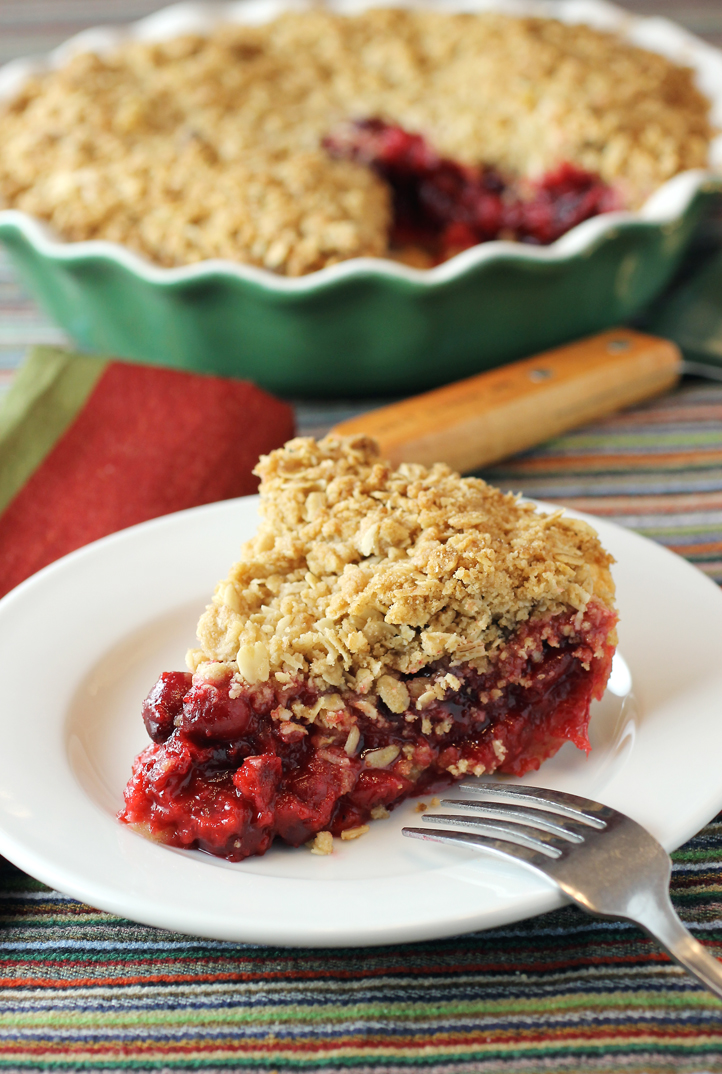
I found it in “Cranberry Crumble Pie.”
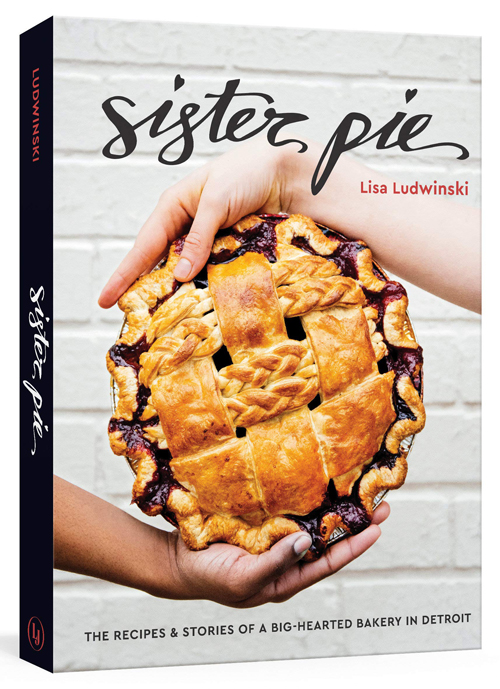
It’s from the new “Sister Pie: The Recipes & Stories of A Big-Hearted Bakery in Detroit” (Lorena Jones Books), of which I received a review copy.
Bakery owner owner Lisa Ludwinski offers up 75 pie recipes from her Sister Pie in Detroit, everything from “Sour Cherry Bourbon Pie” and “Sweet Potato Coconut Pie” to “Apple Cheddar Rye Hand Pies” and “Ginger Peach Biscuit Pie.”
The Detroit native also has a heart of gold. No one walks in the doors of this bakery without getting a slice of pie. Even those who can’t afford it can still indulge, thanks to the “pie it forward” clothesline strung across the window, where people have prepaid for slices for others to enjoy.
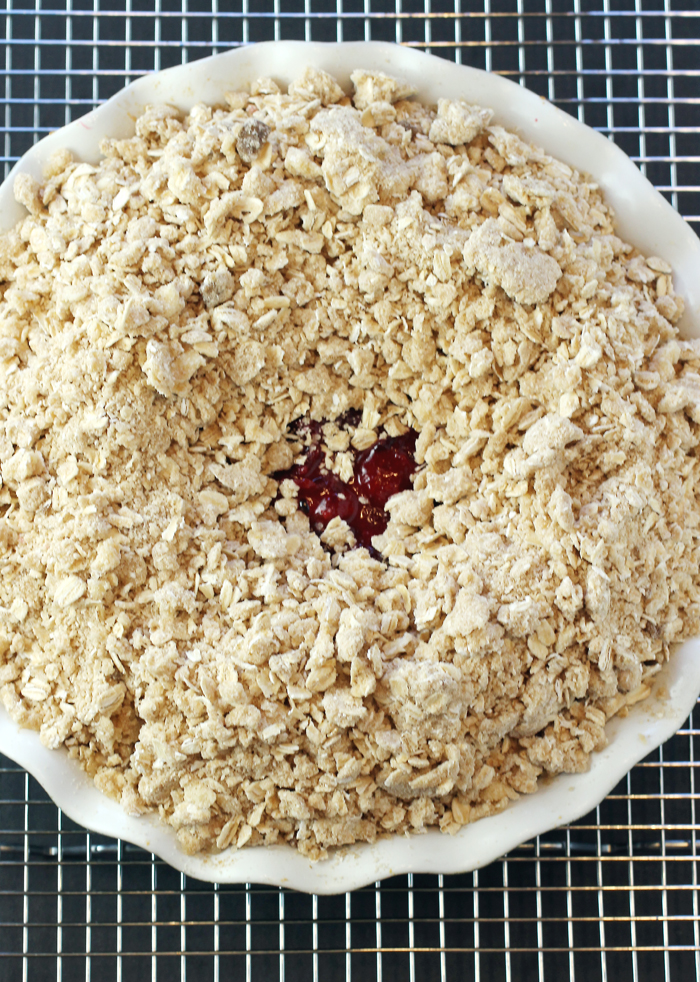
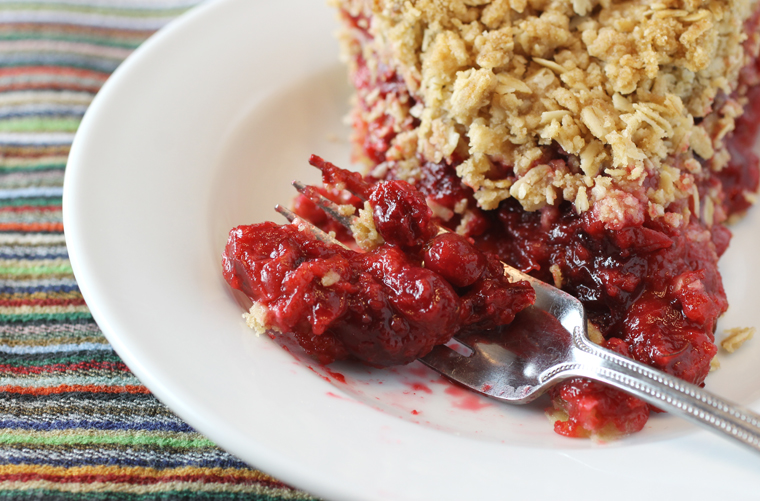
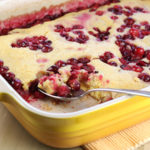
This buttery, flaky crusted pie is filled with both a cranberry compote and fresh cranberries. Then, it gets smothered in a ton of rolled oat streusel that tastes like a buttery granola bar. In fact, at first you might think the amount of streusel is way more than you need. But pile it on because in the baking, it will sink down just a tad, and heck, it tastes so good you’ll be glad you went overboard with it.
The sweetness of the crumble top is a nice contrast to the fruity-tart fruit filling. Because the filling contains both a cranberry compote (cranberries that you cook down to a jammy consistency with sugar) and whole fresh cranberries, each bite brings a riot of flavors. There’s immediate sweetness, but then you hit a burst of sharp tang from one of the whole berries. It’ makes every bite just that more interesting.
The crust also gets a smear of cream cheese before the cranberry filling goes on top. I don’t think you really taste the cream cheese in the end. But what’s not to love about a little cream cheese in the mix, right?
Don’t get afraid when you see the length of this recipe. Ludwinski writes very detailed recipes, outlining each and every step of combining the ingredients for the dough, and rolling it out. It may be more than practiced pie bakers need. But for newbies, it’s a great lesson.
Moreover, the dough, compote and crumble can be made days ahead of time, so you can spread out the work over a couple days to make it less intimidating.
This is a grand pie — special enough for company on an important holiday. But I’ll let you in on a secret: It’s just as divine the next morning for breakfast while you’re still in your jammies, recovering from the festivities the night before.
Cranberry Crumble Pie
(Makes one 9-inch pie)
Compote:
12 ounces cranberries, rinsed and sorted
1/4 cup plus 2 tablespoons packed light brown sugar
3/4 teaspoon grated orange zest
1 tablespoon freshly squeezed orange juice
Crumble:
1 cup rolled oats
1/2 cup packed light brown sugar
1 cup all-purpose flour
1/2 teaspoon ground cinnamon
1/2 teaspoon kosher salt
1/2 cup plus 2 tablespoons (1 1/4 sticks) unsalted butter, straight from the fridge
Filling:
3/4 cup granulated sugar
3/4 teaspoon ground cinnamon
1 teaspoon ground nutmeg
1/2 teaspoon ground allspice
1/4 cup tapioca starch
1 1/2 teaspoons kosher salt
8 ounces cranberries, rinsed and sorted
1/2 Bosc or D’Anjou pear, peeled and grated
Rest of Pie:
2 tablespoons cream cheese, at room temperature
One 9-inch crust made with All-Butter Pie Dough, blind baked and cooled (Recipe below)
1 large egg, beaten
Vanilla ice cream for serving (optional)
Make the compote: Combine the cranberries, brown sugar, and orange zest and juice in a heavy-bottomed saucepan. Cook over low to medium heat until the cranberries begin to burst. Remove from the heat and set aside to cool completely (or set in the freezer for a quick chill) while you continue to work. This compote can be made up to 4 days in advance and stored in the fridge until you’re ready to use it.
Make the crumble: In a mixing bowl, combine the oats, brown sugar, flour, cinnamon, and salt. Place the butter in the bowl and coat on all sides with the flour mixture. Take a bench scraper and cut the butter into 1/2-inch cubes directly into the flour mixture in the bowl. Work to break up the cubes with your hands until they are lightly coated with the flour mixture. Continue to use the bench scraper to cut the cubes into smaller pieces — the ida is that you are cutting each cube in half.
Switch to a pastry blender and being to cut in the butter with one hand while turning the bowl with the other. It’s important not to aim for the same spot at the bottom of the bowl with each movement, but to actually slice through butter every time. You’ll need to clean out the pastry blender every few turns of the bowl. Once most of the butter is incorporated, use your fingers to fully break down the butter until it is no longer visible. Be careful not to overwork the mixture at this point. The crumble can be completed up to 4 days ahead and stored in the fridge.
When you’re ready to bake the pie, preheat your oven to 350 degrees. Line a baking sheet with parchment paper.
Make the filling: In a mixing bowl, combine the sugar, cinnamon, nutmeg, allspice, tapioca starch, and salt. Add the cranberries, pear, and cooled compote and use your hands or a wooden spoon to mix completely.
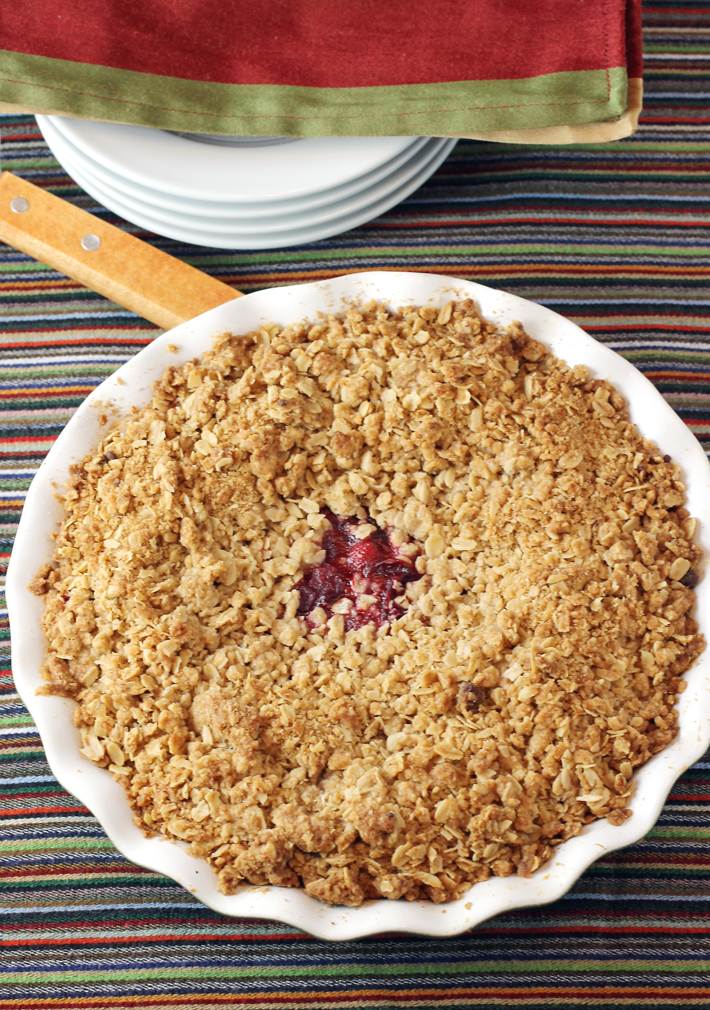
Using a small offset spatula, evenly spread the cream cheese on the bottom of the pie shell. Brush the crimped edge with the beaten egg. Layer the cranberry mixture on top of cream cheese — it should be evenly spread up to the bottom of the crimps. Carefully cover the fruit with the crumble topping, leaving a small hole in the center of the pie to serve both as a steam vent for the fruit as it cooks and as an indicator of when the pie is done. Place the assembled pie on the parchment-lined baking sheet.
Transfer the baking sheet with the pie on it to the oven and bake for 60 to 70 minutes, until the pie juices are beginning to bubble in the center and the crumble topping is a uniformly deep golden color.
Remove the baking sheet from the oven and transfer the pie to a wire rack to cool for 4 to 6 hours. When the pie is at room temperature, slice it into 6 to 8 pieces. Serve with a big scoop of classic vanilla ice creamy.
Store leftover pie, well wrapped in plastic wrap or under a pie dome, at room temperature for up to 2 days.
All-Butter Pie Dough
(Makes 2 discs, enough for one 9-inch double-crust or two 9-inch single-crust pies)
2 1/2 cups all-purpose flour
1 teaspoon granulated sugar
1 teaspoon kosher salt
1 cup (2 sticks) unsalted European-style butter, straight from the fridge
1/2 cup ice-cold water mixed with 1 tablespoon apple cider vinegar
In a large stainless steel bowl, combine the flour, sugar, and salt and stir to mix well. Place the sticks of butter in the bowl and coat all sides with the flour mixture. Using a bench scraper, cut the butter into 1/2-inch cubes. Work quickly to separate the cubes with your hands until they are all lightly coated in flour. Grab that bench scraper once again and cut each cube in half. I always tell my pie dough students that it’s unnecessary to actually cut each cube perfectly in half, but it’s a good idea to break up the butter enough so that you can be super-efficient when it’s pastry blender time.
It’s pastry blender time! Switch to the pastry blender and begin to cut in the butter with one hand while turning the bowl with the other. It’s important not to aim for the same spot at the bottom of the bowl with each stroke of the pastry blender, but to actually slice through butter every time to maximize efficiency. When the pastry blender clogs up, carefully clean it out with your fingers or a butter knife and use your hands to toss the ingredients a bit. Continue to blend and turn until the largest pieces are the size and shape of peas and the rest of the mixture feels and looks freakishly similar to canned Parmesan cheese.
At this point, add the water-vinegar mixture all at once, and switch back to the bench scraper. Scrape as much of the mixture as you can from one side of the bowl to the other, until you can’t see visible pools of liquid anymore. Now, it’s hand time. Scoop up as much of the mixture as you can, and use the tips of your fingers (and a whole lot of pressure) to press it back down onto the rest of the ingredients. Rotate the bowl a quarter-turn and repeat. Scoop, press, and turn. With each fold, your attention is on quickly forming the mixture into one cohesive mass. Remember to incorporate any dry, floury bits that have congregated at the bottom of the bowl, and once those are completely gone and the dough is formed, it’s time to stop.
Remove the dough from the bowl, place it on a lightly floured counter, and use your bench scraper to divide it into two equal pieces. Gently pat each into a 2-inch-thick disc, working quickly to seal any broken edges before wrapping them lightly in a double layer of plastic wrap. Refrigerate the dough for at least 2 hours or, ideally, overnight. When you go to roll out the crust, you want the discs to feel as hard and cold as the butter did when you removed it from the fridge to make the dough. This will make the roll-out way easier.
You can keep the pie dough in the fridge for a few days or in the freezer for up to 1 year. If frozen, remove the dough and place it in the refrigerator to thaw one full day before you intend to use it. If you’re planning to make one single-crust pie, wrap the discs separately and place one in the freezer for another time.
To roll out pie crust, lightly flour your work surface and place the unwrapped pie dough in the center. Using a rolling pin, begin by banging the dough from the left to the right, striking the dough about four times. Rotate the dough 180 degrees and bang across the dough from left to right once more.
Use one tapered end of the rolling pin to press and roll along the edge of the round one single time, enlarging the circle. After each press of the edge, rotate the disc 45 degrees clockwise. If you sense hat the dough is sticking to the surface, lift it up and lightly flour the surface below it.
To begin the final step, place the rolling pin in the very center of the dough. apply pressure to the pin while rolling it away from yourself (stand on your tiptoes to get maximum leverage if necessary), being careful to stop rolling about 1 inch away from the edge (to avoid over-rolling the areas you’ve already rolled). Rotate the disc 45 degrees and roll again. If it becomes difficult to rotate the dough, lift up and lightly flour the surface beneath it. If the top surface of the dough starts to feel sticky, flip it over onto the floured counter and roll on the other side. Continue this roll and rotation process until you have a circle 12 to 13 inches in diameter. Gently run your rolling pin over the entirety of the dough to make sure the final size is an even thickness.
Invert your pie tin or dish onto the circle. Using a pastry cutter or knife, and the pie tin as a guide, cut a circle around the tin that is 2 1/2 to 3 inches larger than the edge of the tin. Remove the pie tin and turn it right side up on the work surface. Fold the dough circle in half. Place the folded dough in the pie tin so that it covers one-half of the pan. Unfold the other half, and gently press the dough to fit snugly into the tin, making sure it is completely centered and pressed all the way into the bottom of the tin. Use your fingers to crimp the edges. Put the crust in the freezer for at least 15 minutes before baking.
Preheat oven to 450 degrees with the rack on the lowest level.
Remove the pie crust from the freezer, tear off a square of aluminum foil that is slightly larger than the pie shell, and gently fit it into the frozen crust. Fill the crust with dried beans (about 1 1/2 pounds; they should come all the way up to the crimps) and place the pie pan on a baking sheet. Transfer the baking sheet to the oven and bake for 25 to 27 minutes. Check for doneness by peeling up a piece of foil — the crimps should be light golden brown. Remove the baking sheet from the oven and transfer to a cooling rack. After 6 minutes, carefully remove the foil and beans. You are now ready to fill the pie.
Adapted from “Sister Pie” by Lisa Ludwinski
More Cranberry Recipes to Try: Cranberry and Apple Kuchen with Hot Cream Sauce
And: Cranberry-Creme Fraiche Cake
And: Saucy Cranberry Maple Pudding Cake
And: Cranberry Roly-Poly





Can’t wait to try it! Thank you for posting the recipe… I know I’m getting the book for Christmas so I’ve been hoping someone would!!!
Pro-tip: for those too lazy to actually prepare the pie themselves, Whole Foods is selling them, made from the same Sister Pie recipe, at least here in the Bay Area.
Brent: Great tip! That’s definitely the easier route if you don’t want to make it, yourself, or need a last-minute dessert. Thanks for the info.
Wow! This is definitely a fabulous alternative to pumpkin pie.
Pingback: Coffee + Convo
i think this is the first cranberry pie i’ve seen, and with a delightful crumble topping, no less! delicious. 🙂
Is it really only 3/4 tap sugar in the filling?
Rdw: Thanks for spotting that typo. It should be 3/4 CUP sugar in the filling. I have changed it. Thanks again for your eagle eyes.
My family thought this pie was not sweet enough and I thought it was actually a little salty! Otherwise I loved it – after pouring a little maple syrup on it!
Shawn: Maple syrup is good on anything! 😉 The filling definitely lets the fruity-tartness of the cranberries shine through.